How to back up your Google account: instructions
If you are one of those people who are afraid of losing your Google account, depend on Google Photos or other services, we recommend that you create a "fallback" in the form of a backup account. This will save you from stressing over gigabytes of suddenly lost files and materials.
There are other good reasons to create a backup account. Maybe you change jobs, decide to stop using a particular account, or just want to have a copy of your files.
Whatever your motives, it will keep your valuable information safe in any case. So read on for the benefits of having a backup account and instructions on how to create one.
Why you need a backup of your Google account
So, having a backup of your Google account has a number of advantages. They can be summarized in a few main points:
- Protection against data loss. If your account is lost or damaged, you can save or disaster recover your files.
- Data migration. You can transfer your data to another account or another platform and access it if you change your account.
- Protection against hacking. Having a backup copy will help restore access to data in case of hacking or unauthorized access.
- Preserving memories Your photos, videos, documents, and other data will be stored in a safe place until you need them in the future.
- Transferring to a new device. It will be quite easy to transfer data by restoring it from a backup.
- Failure recovery. In the event of a Google service failure, data from a backup can be easily restored.
Instructions for creating a copy of your Google account
It is quite easy to create an additional account, but in unforeseen situations, you will fully appreciate its value. Therefore, read the instructions:
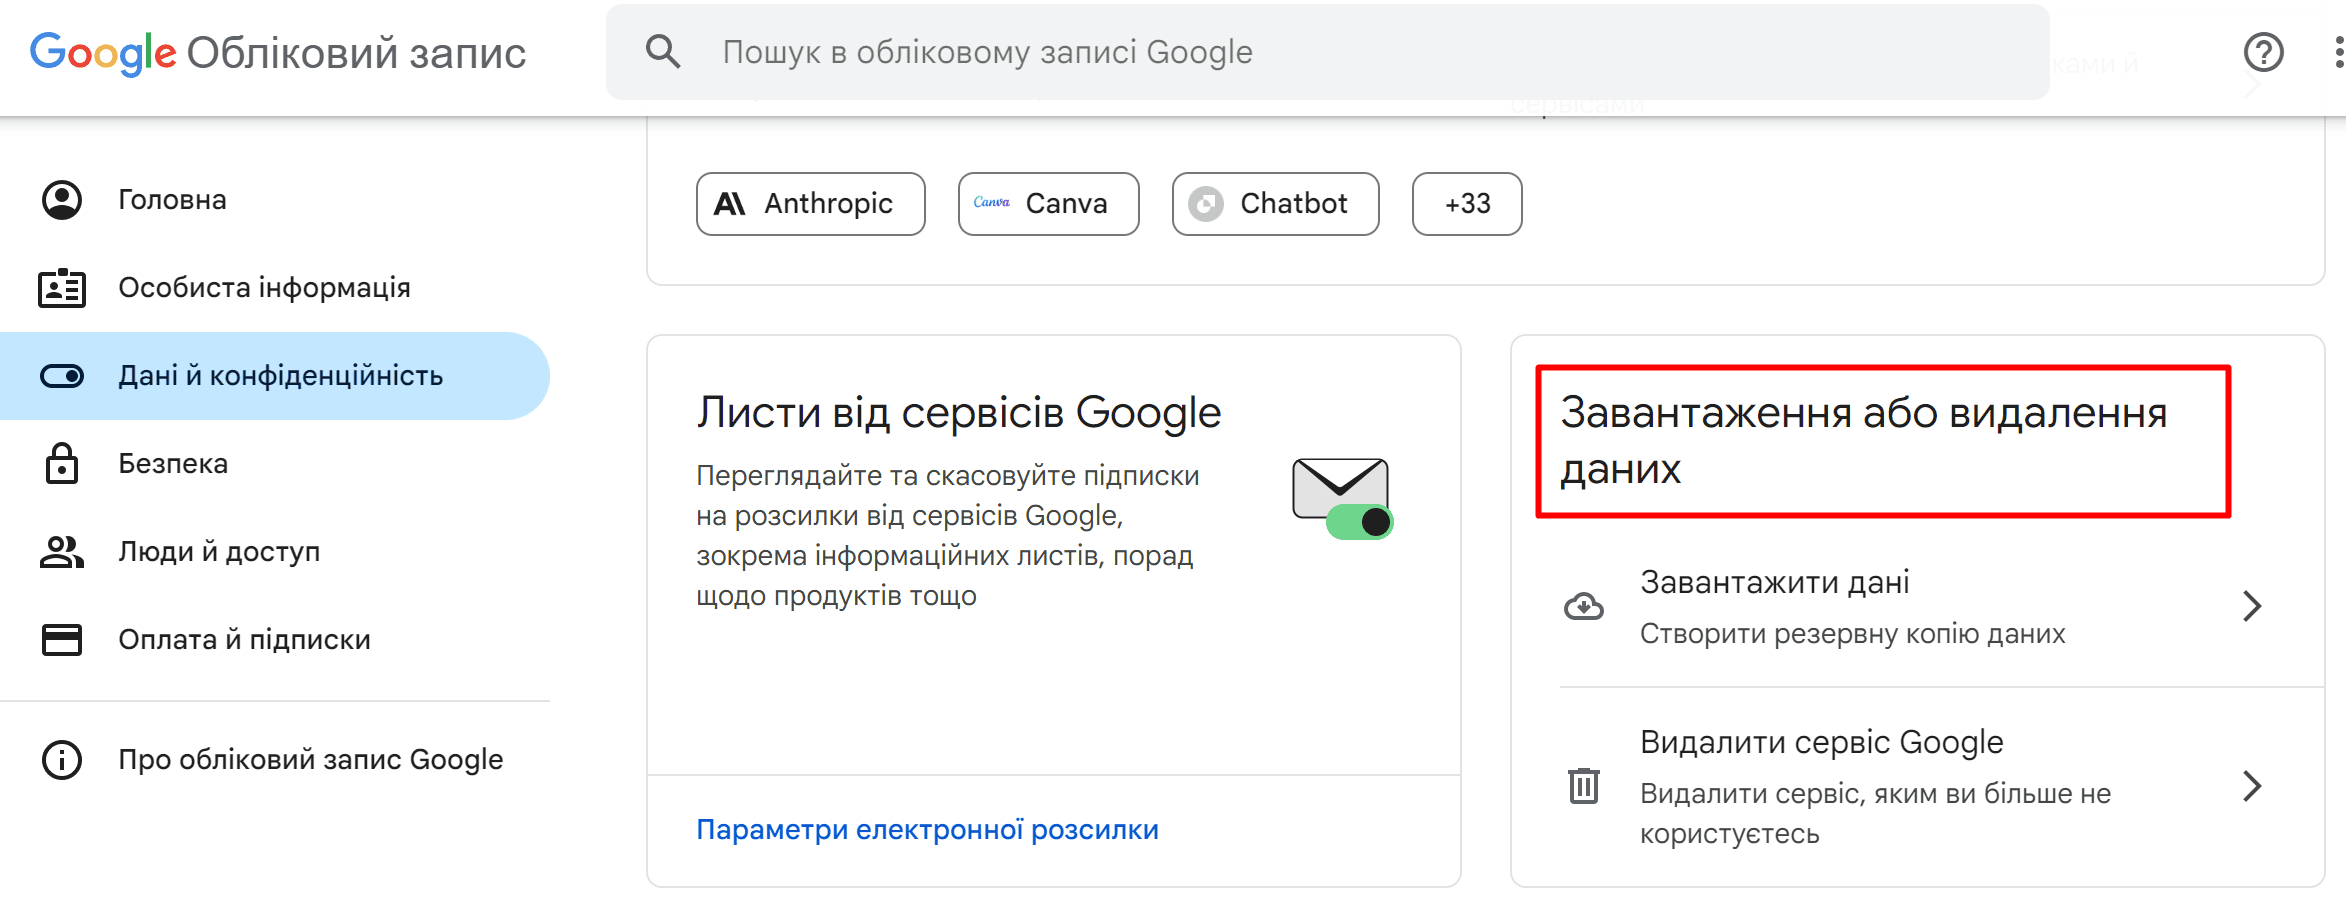
- Go to myaccount.google.com.
- In the Data & Privacy section, scroll down to the bottom, find the Upload or delete data option, and click Upload data.
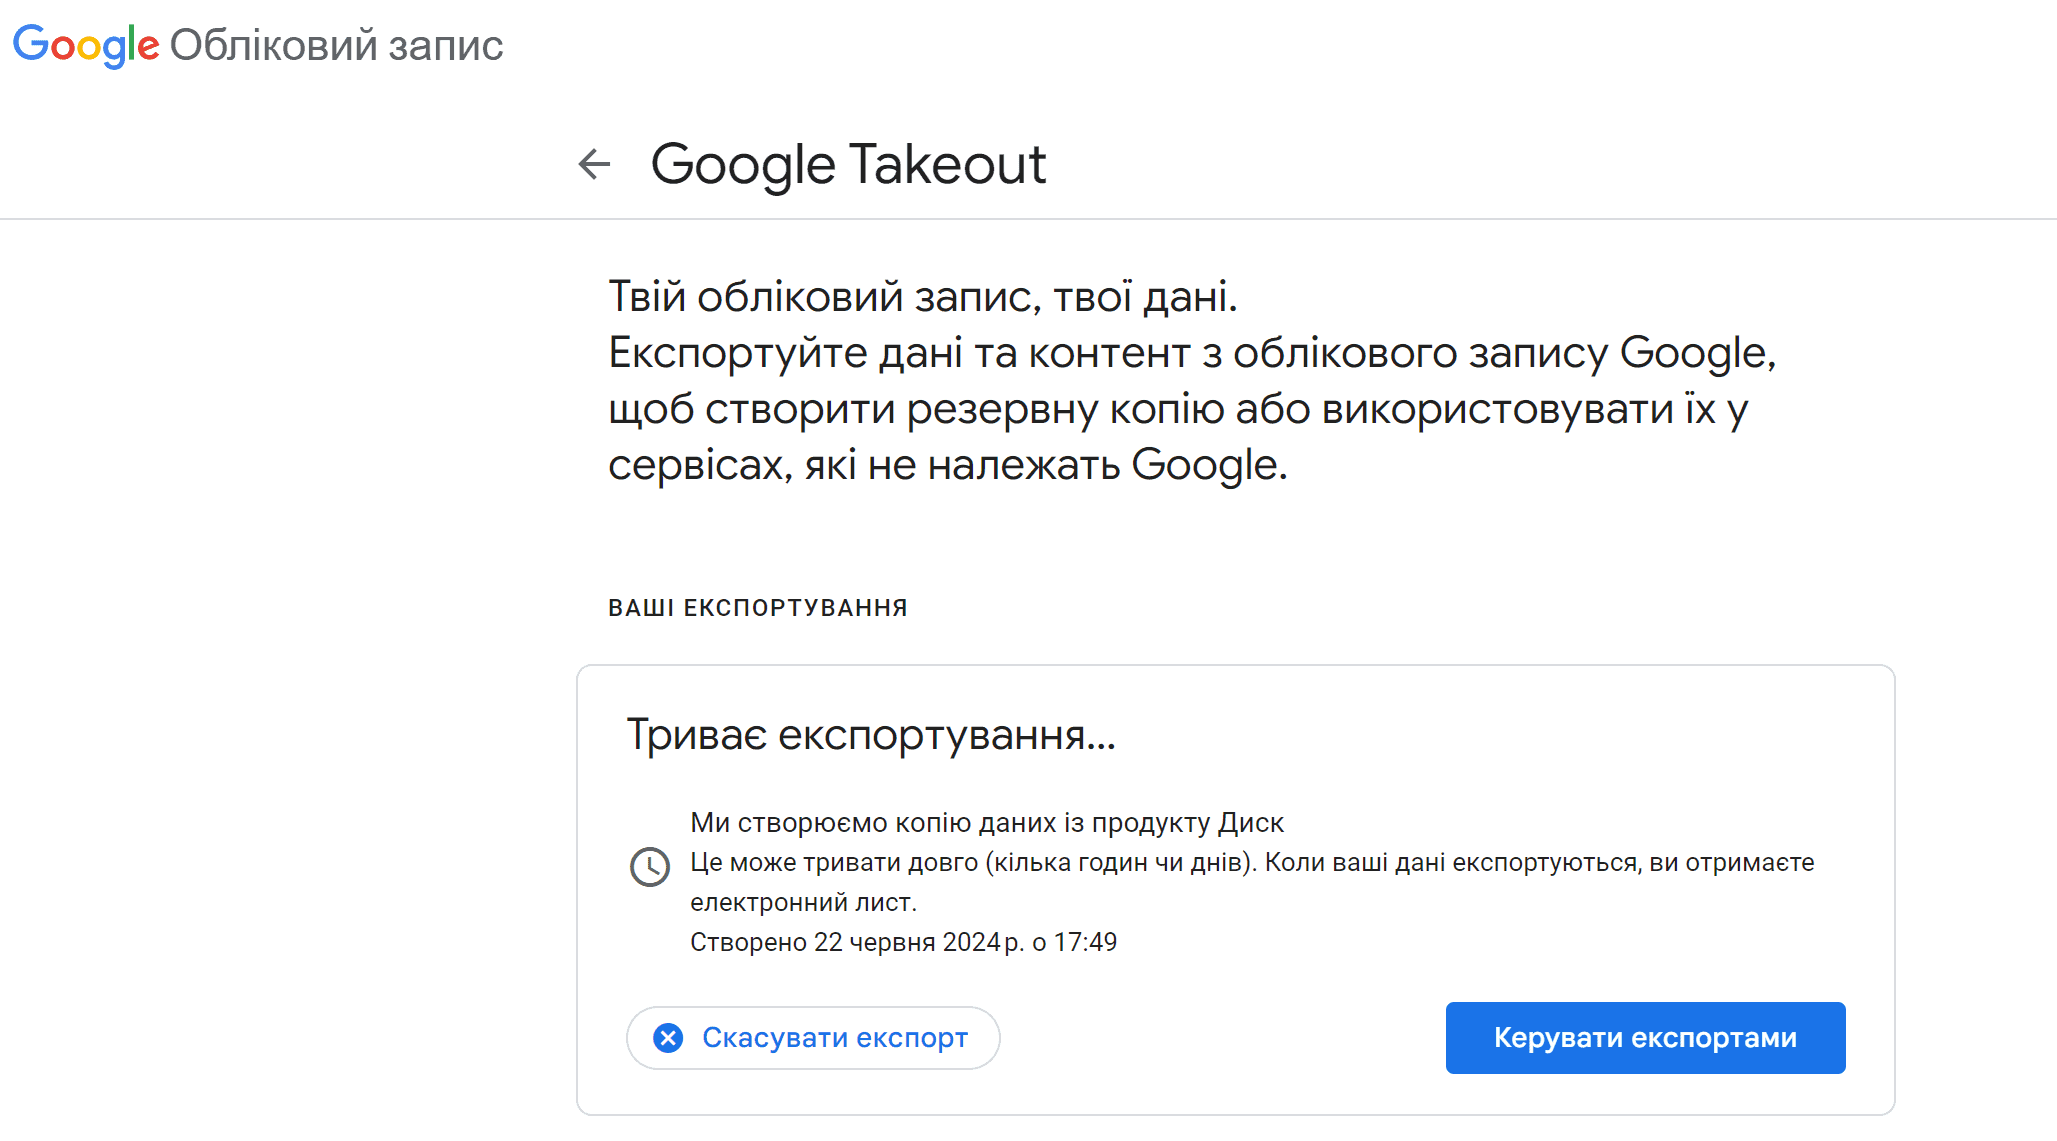
- You will be taken to the Google Takeout page. Determine which data you want to download. If, for example, only from Gmail, then click "Deselect" at the top of the page, and then check the necessary boxes.
- Scroll down to see all the different data sources you will be uploading. The more data you want to download, the longer it will take and the larger the files will be. Once you've made your choice, move on./li>
- In some categories, there will be a button that says "All XX data included" (XX is the name of the program). Click on this button to see if there are categories you don't want to download - maybe, for example, you don't need a backup of all your promotional emails.
- Scroll down the page and click Next Step.
- Next, the program will ask you to decide how you want to receive the data: by email, add to Google Drive, Dropbox, OneDrive, or Box. To choose, click the "Delivery method" window. But note that if you're afraid of losing access to your data on Google, storing it on Drive may not be very reliable.
- You can also choose whether to export the data only once or every two months during the year. You are also prompted to choose the type of compression (.zip or .tgz) and the maximum file size. After you make your choice, click the "Export data" button.
- The export will start and its progress will be shown on the page. It may take a few days to complete. You can also choose to Cancel export or Manage exports.
When you need to restore copied data, which, for example, will be sent as a link to an e-mail:
- Go to the email from Google Takeout.
- Click the Download button.
- Next, you need to enter your email password.
- Before copying data to another service, the program advises you to review the export rules.
- After clicking the "Download" button, the Zip file will be downloaded to your device.
- Unzip the archive. You will see a folder structure that corresponds to your Google services (for example, Drive, Gmail, Photos, etc.).
- Upload the files manually one by one.
Experts recommend repeating the backup procedure regularly and storing data in a safe place, such as a cloud storage or an external hard disk. You can also create an additional layer of security by encrypting information. All of these steps will help you keep your valuable information safe and insure yourself against unforeseen situations.